react-native-image-crop-picker是一款强大的iOS/Android图像选择器,可支持摄像头,可配置压缩,可多选图像和可对图像进行裁剪的。
但是,在我用过的所有插件中,它是最经常报错的那一款,各种奇奇怪怪的红色错误信息,看的我很绝望。(╯°□°)╯︵┻━┻ 总之记录一下如何安装和使用吧。
安装
步骤一
在项目运行命令行
npm i react-native-image-crop-picker --save
步骤二
对于iOS
运行命令行
react-native link react-native-image-crop-picker
如果使用的是Cocoapods,官方网站强烈推荐使用以下方式安装
运行命令行
cd ios //进入ios文件夹
pod init
编辑 Podfile,示例内容如下:
platform :ios, '8.0'

target '<project_name>' do
  # this is very important to have!
  rn_path = '../node_modules/react-native'
  pod 'yoga', path: "#{rn_path}/ReactCommon/yoga/yoga.podspec"
  pod 'React', path: rn_path, subspecs: [
    'Core',
    'RCTActionSheet',
    'RCTAnimation',
    'RCTGeolocation',
    'RCTImage',
    'RCTLinkingIOS',
    'RCTNetwork',
    'RCTSettings',
    'RCTText',
    'RCTVibration',
    'RCTWebSocket'
  ]

  pod 'RNImageCropPicker', :path =>  '../node_modules/react-native-image-crop-picker'
end

# very important to have, unless you removed React dependencies for Libraries
# and you rely on Cocoapods to manage it
post_install do |installer|
  installer.pods_project.targets.each do |target|
    if target.name == "React"
      target.remove_from_project
    end
  end
end
跑起来之后下载安装
pod install
使用 ios/<project_name>.xcworkspace. 不要使用 ios/<project_name>.xcodeproj。
对于Android
react-native link react-native-image-crop-picker
配置
对于iOS
1. 相册权限的设置
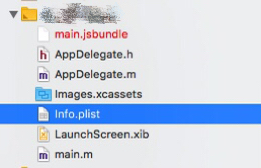
用Xcode打开项目,打开项目的info.plist文件
添加字符串键NSPhotoLibraryUsageDescription 这个描述了为什么需要访问用户照片。根据所使用的功能,还可能需要NSCameraUsageDescription和NSMicrophoneUsageDescription键。
可以在Information Property List 中 点击添加按钮

或者这样添加
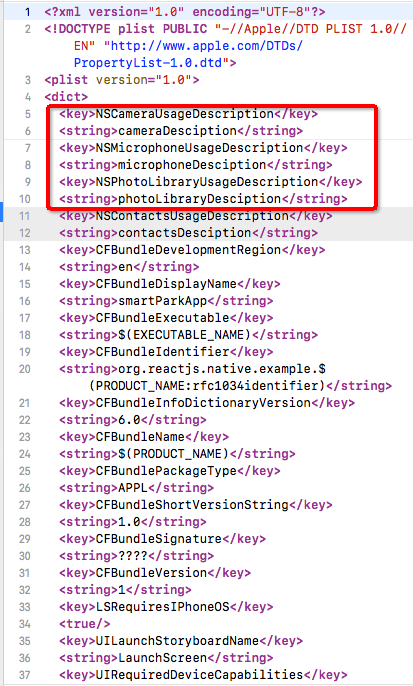
	<key>NSCameraUsageDescription</key>
	<string>cameraDesciption</string>
	<key>NSMicrophoneUsageDescription</key>
	<string>microphoneDesciption</string>
	<key>NSPhotoLibraryUsageDescription</key>
	<string>photoLibraryDesciption</string>
2. Xcode部署环境的设置
如果没有使用Cocoapods
-
将ios/ImageCropPickerSDK文件夹拖放到xcode项目中。(如果需要,确保勾选了复制项)
-
单击项目,在General选项卡
-
在
Deployment Info下,将Deployment Target设置为8.0
-
在
Embedded Binaries下, 点击+然后添加RSKImageCropper.frameworkandQBImagePicker.framework
-
对于Android
1.确定所使用的Gradle >=2.2.x
到目录android/build.gradle下,确定使用的Gradle 大于或者等于 2.2.x
buildscript {
    ...
    dependencies {
        classpath 'com.android.tools.build:gradle:2.2.3'
        ...
    }
    ...
}
2.配置build.gradle
在android/build.gradle添加以下内容,这个非常重要!!
allprojects {
    repositories {
      mavenLocal()
      jcenter()
      maven { url "$rootDir/../node_modules/react-native/android" }

      // ADD THIS
      maven { url 'https://maven.google.com' }

      // ADD THIS
      maven { url "https://jitpack.io" }
    }
}
3.增加 useSupportLibrary
在android/app/build.gradle添加以下内容
android {
    ...

    defaultConfig {
        ...
        vectorDrawables.useSupportLibrary = true
        ...
    }
    ...
}
4.使用 Android SDK >= 26
在android/app/build.gradle下查看
android {
    compileSdkVersion 27
    buildToolsVersion "27.0.3"
    ...

    defaultConfig {
      ...
      targetSdkVersion 27
      ...
    }
    ...
}
5.添加相册选择器
在android\app\src\main\AndroidManifest.xml中添加以下内容
<uses-permission android:name="android.permission.CAMERA"/>
6.添加前置摄像头
在android/app\src\main\AndroidManifest.xml中添加以下内容
<uses-feature android:name="android.hardware.camera" android:required="false" />
<uses-feature android:name="android.hardware.camera.front" android:required="false" />
使用
引入
import ImagePicker from 'react-native-image-crop-picker';
从相册中选择
使用带有裁剪功能的单幅图像选择器
ImagePicker.openPicker({
  width: 300,
  height: 400,
  cropping: true
}).then(image => {
  console.log(image);
});
多选图像选择器
ImagePicker.openPicker({
  multiple: true
}).then(images => {
  console.log(images);
});
视频选择器
ImagePicker.openPicker({
  mediaType: "video",
}).then((video) => {
  console.log(video);
});
注意:对于Android,“裁剪”功能更会导致视频无法在Android平台上展示。在选择视频时,请不要设置cropping为true。
从相机中选择
ImagePicker.openCamera({
  width: 300,
  height: 400,
  cropping: true
}).then(image => {
  console.log(image);
});
裁剪图片
ImagePicker.openCropper({
  path: 'my-file-path.jpg',
  width: 300,
  height: 400
}).then(image => {
  console.log(image);
});
可选的清理
模块创建的tmp图像会在未来的某个地方被自动清理。如果想强制清理,可以使用clean来清理所有tmp文件,或者清除(路径)来清理单个tmp文件。
ImagePicker.clean().then(() => {
  console.log('removed all tmp images from tmp directory');
}).catch(e => {
  alert(e);
});
一些坑
问题:iOS build失败 QBImagePicker/QBImagePicker.h file not found
解决:参考iOS build failed with QBImagePicker/QBImagePicker.h file not found
- in XCode, run both
CleanandClean Folder... - close XCode
- Remove the
DerivedDatafolder of the related project (in<user>/Library/Developer/Xcode/DerivedData) - from command line, in the project folder, run
react-native unlink react-native-image-crop-picker - in
<project folder>/iosremove thePodsfolder and the pod lock file - in
<project folder>remove thenome_modulesfolder and theyarn.lockfile - Empty recycle bin
- run
sudo yarn - chmod 777 the node_modules folder
- go into
<project folder>/iosand run a pod install - from command line, in the project folder, run
react-native link react-native-image-crop-picker - Open Xcode
- Wait for indexing process to be over
问题:Android 经常会 build 失败,各种原因不明
解决:
只能说多注意这些问题,或者尝试使用以下任意一步去解决
- 注意到目录android/build.gradle下,确定使用的Gradle 大于或者等于 2.2.x
- 移除node_modules,重新
npm install - 这样配置
build_gradle
apply plugin: 'com.android.library'

android {
    compileSdkVersion 27
    buildToolsVersion "27.0.3"

    defaultConfig {
        minSdkVersion 16
        targetSdkVersion 27
        versionCode 1
    }
    lintOptions {
        abortOnError false
    }
}

dependencies {
    compile 'com.facebook.react:react-native:+'
    compile 'com.github.yalantis:ucrop:2.2.2-native' => this change => compile 'com.github.yalantis:ucrop:2.2.1-native'
    compile 'id.zelory:compressor:2.1.0'
}
- Android多选的张数没有限制,Android多选是长按
更多相关的信息移步react-native-image-crop-picker